Welcome to my Blog!

This is a place for me to share my love of crafts. Right now, I work mostly with paper and beads, but I have been venturing into fabric of late as well. Enjoy!

Monday, December 10, 2007

Baroque Holiday Candle

Supplies
6” Pillar Candle (AC Moore $2)
Baroque Motifs Stamp Set
Tissue Paper
Wild Wasabi Classic Stamp Pad
Purely Pomegranate Classic Stamp Pad
Purely Pomegranate Doubled Stitched Ribbon
Wax paper
Heat Tool

Directions

Cut a 5” x 9.5” piece of tissue paper.
Using the vine stamp from Baroque Motifs and the Wild Wasabi Classic Stamp Pad Stamp 3-4 vines alternating directions on the tissue paper.
Using the small flower and the Purely Pomegranate Classic Stamp Pad stamp some flowers on the vines.
Wrap the stamped tissue around the candle. Try to get it as smooth as possible.
Cover with Wax Paper, leaving excess to make a handle.
Heat with heat tool until the tissue is completely melted into candle. You may have to rotate the wax paper and the candle. It’s also good to preheat the heat tool for about 10 seconds.

Thursday, November 8, 2007

Wintrgreen Paper Glass Ornament

Supplies
Glass Ornaments (Michael’s 6/ $4.99)
Wintergreen Designer Series Paper
5/8” Certainly Celery Grosgrain ribbon
Silver Elastic Cord
Skinny pencil, dowel or pen

Directions
Cut about 20-25 6 x ½” strips of desired Wintergreen papers.
Wrap each strip tightly around your pencil, dowel or pen.
Take the top off the ornament and drop each rolled strip in, shaking up after every two or three.
Re-attach the lid.
Tie a Silver elastic cord around the top as a hanging device (about 8-9 inch strip).
Tie a bow of 5/8” Certainly Celery Grosgrain Ribbon around the base and trim ends as desired.

Sunday, October 21, 2007

Stamp-a-Stack Film Strip Merry & Bright

This is the other card we are doing the Holiday Stamp-a-Stacks this year. Thsi was a fun card to make. I CASEd the filmstrip idea from Janee Levsen From a swap I received a while ago. Enjoy!

Supplies
Merry & Bright Stamp Set
Totally Tabs Stamp Set
Everyday Flexible Phrases Stamp Set
Confetti White Card Stock
Blue Bayou Card Stock
Wild Wasabi Card Stock
Whisper White Card Stock
Basic Black Card Stock
Wisper White Craft Stampin’ Pad
Staz on Jet Black Stamp Pad
Not Quite Navy Classic Stamp Pad
Real Red Stamp Pad
Iridescent Ice Stampin’ Emboss
Powder
Real Read Grosgrain Ribbon
Heat Tool
Spiral Punch
Round Tab Punch
1 3/8 Square Punch
Water Color Wonder Crayons, Earth Elements
Aqua Painters

Directions
· Cut a 5.5 x 8.5 piece of Whisper White card stock. Score and fold at 4.25.
· Cut a 5.25x4 piece of Blue Bayou Card Stock.
· Cut a 2 ¾ x 4 ¾ piece of Wild Wasabi Card Stock.
· Cut a 2 ½ x 4 ½ piece of Basic Black Card Stock.
· Using the Whisper White Craft pad and the snowflake stamp from Very Merry and stamps a snowflake pattern on the Blue Bayou piece of card stock.
· Sprinkle Iridescent Ice Stampin’ Emboss Powder and shake off extra. Heat with the heat tool until set.
· On scrap Whisper White CS, using the Staz On Jet Black Stamp Pad, stamp one each of the snow man, tree and deer.
· Color in using Aqua Painters and Water Color Wonder Crayons.
· Using the 1 3/8 Square Punch, punch each one out.
· Using the Spiral Punch, punch the length of the Basic Black strip…both sides.
· Adhere to black strip to look like film negatives.
· Adhere black strip to Wild Wasabi strip.
· On Scrap of Whisper White, stamp the sold round tab stamp from Totally Tabs. Stamp it once on scrap and then once for real. Punch out.
· Stamp Sentiment on tab and adhere to Wasabi near top right.
· Tie ribbon around the Blue Bayou stamped and embossed card stock about 1 inch up from the bottom.
· Adhere the Wasabi to the front of the Blue Bayou.
· Adhere the Blue Bayou to the front of the Confetti White Card.

Stamp-A-Stack Card #1 Snowburst One Sheet Wonder

We are doing this card at my Holiday Stamp-A-Stack events this year. This is a project that you can complete as a One-Sheet Wonder or on as a single card. If you are using the One-Sheet-Wonder, Stamp the pattern on the Whisper White full 8 1/2 x 11 sheet and then Cut the 2 1/2 x 5 1/2 strips. This will make it go a lot faster AND you will get enough strips for 8 Cards and some scraps you could use for other projects!And for a little more glitz, you ca use a rhinestone brad in the center. If you don't own the Snowburst set, you can substitute any circle design stamp set, such as Seeing Spots or Polka Dots and Petals! The directions below are for doing a single card at at time because, we were only make 5 cards of this design at the stamp-a-stacks and I know people like to do their own stamping.

Supplies
Snow Burst Stamp Set
Happy Everything Stamp Set
Wild Wasabi Card Stock
Whisper White Card Stock
Purely Pomegranate Card Stock
Wild Wasabi Classic Stamp Pad
Silver Encore Pad
Purely Pomegranate Classic Stamp Pad
Versamark Pad
Silver Stampin’ Emboss Powder
Wild Wasabi Double-Stitched Ribbon
Heat Tool
Silver Brands
Scalloped Circle Punch
1 3/8 circle Punch
Paper Piercing Tool
StampinDimmensionals

Directions
· Cut a 5 1/2 x 8 1/2 piece of Wild Wasabi card stock. Score and fold at 4.25.
· Cut a 2 ¾ x 5 1/2 piece of Purely Pomegranate Card Stock.
· Cut a 2 ½ x 5 1/2 piece of Whisper White Card Stock.
· Using three of the smaller designs in the Snow Burst Stamp Set, and the Wild Wasabi, Purely Pomegranate and Silver inks, stamp a pattern on the Whisper White Cards Stock piece.
· Adhere the white strip to the pomegranate strip.
· On a White scrap, stamp the big snowflake in Purely Pomegranate. Punch out with 1 3/8 circle punch. The entire image will not fit.
· Using the paper piercing tool, punch a hole in the center of the snowflake. Insert silver brad.
· Punch out a pomegranate scalloped circle.
· Adhere the stamped circle to the scalloped pomegranate circle.
· Cut a 3-inch piece of Wild Wasabi Double-Stitched ribbon. Adhere folded onto the back of the scallped circle . Adhre the whole thing to the left side of the whisper white stamped strip.
· Adhere the whole thing to the card, about ¼ inch from the top.
· Stamp Happy and holidays in versamark on the lower right side of the green card front.
· Sprinkle with silver stampin’ emboss powder and set with heat tool.

Saturday, October 13, 2007

Tins


I made these cute little tins and had a ball doing it. They use the Happy Me Simply Scrappin' Bundle (Hostess Level 3). I got the tins from the $1 spot at Target a while back....they were full of Tootsie Rolls...had fun eating those as well. The pens are from the $1 at Target as well and the mini clipboard came in a three pack for $1 at AC Moore.

Tuesday, October 9, 2007

My Stamp Room---Finally


For years, I've been using a corner in my living room. Well, finally, I downsized my kids toys and moved them to their rooms and the basement since they're a little older and turned their playroom in to my stamp room. It's so nice to be able to spread out and not have to clean up everything for the night every day. It's also nice when I hold classes at my house so I don't have to move everything to my dining room.:) I just had to share. I've had it like this for about 3 weeks now and I finally hung the bulletin boards today. :) They're 12x12 cork panels with Blue Bayou DP. :)


My Eyelet, Brad and Button Storage

We were posting on SUFriends today our Tuesday Tips. I mentioned this organizer and several have asked to see it, so I'm posting it here.
I use these bead storage containers to store my brads, buttons and eyelets. I have them all labled by color and type. I use these because I have 2- and 4-year-old boys who get into everything and I was worried about my 2-year old swallowing them. They can't open them too easliy, so I feel better. Plus, I can easily see if I need to order more or if I have enough to do my project that I want to do. :)

Sunday, October 7, 2007

National Military Family Month Card


National Military Family Month is November and I've been trying to come up with cards that celebrate our patriotism, but also show support for our troops who are stationed overseas. So far, this is what I've come up with. Any comments, suggestios would be much appreciated!

Saturday, September 22, 2007

Christmas Blessing 3-D card

I made this card for a swap I participated in recently. It folds flat to fit in a standard card envelope. Enjoy! I've had sevaral folks ask me how to make it, so here are the directions.


Supplies
· Baby Jesus is Born Stamp Set
· Linen Stamp Set
· All Through The Year Stamp Set
· Blue Bayou Card Stock
· Close to Cocoa Card Stock
· Whisper White Card Stock
· Staz On Jet Black Ink
· Close to Cocoa Classic Stamp Pad
· Whisper White Craft Stamp Pad
· Earth Elements Water Color
· Iridescent Ice Stampin’ Emboss Powder
· Wonder Crayons
· Aqua Painters
· Coluzzle cutter and oval template
· Crop-a-Dile
· Jumbo Eyelets
· Linen Thread
· Sticky Strip
· Heat Tool


Directions
1. Cut a 4 ¼” x 7 ½” piece of Blue Bayou Card Stock. Score at 2” and 5.5” and set aside.
2. Cut a 4 ¼” x 7 ½” piece of Close to Cocoa card stock. Score at 2” and 5.5”.
3. Using the Close to Cocoa Classic stamp Pad and the Linen Stamp Set, stamp the linen background. TIP: Fold the ends in and stamp the front first, then stamp each flap. That way it’s easier to match up the pattern.
4. Using the Coluzzle Oval template and blade, cut an oval out of the center of the stamped close to Cocoa Piece using the 4th oval from the center of the template.
5. Using the Crop-a-Dile punch two large holes at the top and set two Jumbo eyelets.
6. Insert linen thread and tie a knot in the center. Use at least two layers.
7. Set aside Close to Cocoa piece.
8. Cut a 4 1/4” x 5 ½” piece of Blue Bayou and score at 1” and 4 ½”.
9. Using the Coluzzle Oval template and blade, cut an oval out of the center of the stamped close to Blue Bayou Piece using the 4th oval from the center of the template.
10. Using the star from All Through The Year, stamp a pattern of stars on the front of this Blue Bayou piece using the Whisper White Craft ink.
11. Sprinkle with Iridescent Ice Stampin’ Emboss powder and set with the heat tool.
12. Set Aside.
13. Cut a 4 x 3 ¼” piece of Whisper White Card Stock.
14. Using the Staz On Jet Black stamp pad, stamp the image from Baby Jesus is Born.
15. Water color the image with the Earth Elements Water Color Wonder Crayons and Aqua Painters.
16. Once Dry, adhere to the inside of the first piece of Blue Bayou you cut and set aside.
17. Using Sticky strip Fit the edges of the star stamped Blue into the folds and adhere with sticky strip.
18. Then fit the edges of the larger Blue Bayou into the folds of the Close to Cocoa and adhere with Sticky Strip.
19. Stamp the Christmas Blessing sentiment onto a scrap of Whisper White Card stock with the Close to Cocoa Stamp Pad and punch out with the Large Oval Punch.
20. Distress and drag the oval through the Close to Cocoa Stamp Pad.
21. Adhere to the front of the card.


Monday, September 10, 2007

NNMC to Gitmo


Here's a project I threw together last night when my husband asks me if I have any deployment related cards lying around. His Department Head At the National Naval Medical Center is deploying to Gitmo this month and he his whole department will be there today, so he wanted to get it signed today. This uses the emboss resist technique. You'll notice it's very similar to a card I'll be posting soon from Stamp Club at the end of August. ;)

It's Been A While...

Sorry I haven't posted much lately. We took vacation, then it was back to school for my 4-year-old, not I'm cleaning out closets and trying to make a stamp room....I'll keep you posted! Meanwhile, I will post some new projects soon!

Friday, August 10, 2007

A Nice Gift!


A friend's birthday was last month, and this is a set that I made for her. The box is a chipboard one I got at AC Moore and I covered it wth DP and ribbon. I filled it withh 4 of each cards. You can't see the red one on the right very well, but it has the cow and sheep from Farmyard Jumbo in the window...really cute, if I do say so myself! I loved making these. :)

Monday, August 6, 2007

Faux Metal Technique Class

I just finised teaching my faux metal technique class and wanted to share the projects for those of you who weren't able to make it.

If you want to shedule a class of your own at my House or yours, you need to have a minimum of 4 people committed to attend the class at $15 per person.


Faux Metal 6x6 Technique Sample
This was designed to be put in an album so that you can refer to it later.

Supplies
Year After Year Stamp Set
Short Order Alphabet
Baroque Border Wheel
Certainly Celery CS
Whisper White CS
Pretty in Pink CS
Certainly Celery CSP
Certainly Celery Stampin’ Around Cartridge
Versamark Pad
Silver Stampin’ Emboss powder
Heat Tool
1” circle punch
1 ¼” circle punch

Directions
1. Cut a 1 ¾ x 2 ½ piece of Whisper White card stock.

2. Ink heart stamp from Year After Year in Versamark ink and set aside.

3. Ink your card stock with the Versamark pad by pressing pad directly onto the card stock.

4. Sprinkle with silver embossing powder.

5. Heat with heat tool.

6. While it is still hot, sprinkle with embossing powder and heat again. Repeat three more times.

7. Stamp the embossed area with your stamp that you set aside. Set aside to settle.

8. Cut a 6 x 6 piece of Certainly Celery Card Stock.

9. Cut a 2 x 2 ¾ piece and a 2 ½ x 3 ¾ piece of Pretty in Pink Card Stock.

10. Cut the directions out to 2 ¼ x 3 ½ . Mat with the 2 ½ x 3 ¾ piece of pink card stock.
11. Mat the heart with the other piece of pretty in pink card stock.

12. Wheel the Baroque Border on the left hand side of the page.

13. Position the technique directions and the heard on the page as desired.

14. Stamp Faux Metal in Certainly Celery ink on Whisper White Card Stock.

15. Punch out with the 1” circle punch.

16. Punch out 1 ¼” circle mats and adhere to the letter circles.

17. Adhere words to the pages as desired.

Carte Postale Faux Metal Card

Supplies
Carte Postale Stamp Set
Blue Bayou Card Stock
Confetti White Card Stock
Whisper White Card Stock
Creamy Caramel Card Stock
Blue Bayou Classic Stamp Pad
Creamy Caramel Classic Stamp Pad
Versamark Pad
Silver Emboss Powder
1 3/8” Square Punch
Small Oval Punch
Large Oval Punch
Blue Bayou Double Stitched Ribbon

Directions
1. Take a scrap of Whisper White Card Stock.

2. Ink square flower stamp from Carte Postale in Versamark ink and set aside.

3. Ink your card stock with the Versamark pad by pressing pad directly onto the card stock.

4. Sprinkle with silver embossing powder.

5. Heat with heat tool.

6. While it is still hot, sprinkle with embossing powder and heat again. Repeat three more times.

7. Stamp the embossed area with your stamp that you set aside. Set aside to settle.

8. Cut a 5 ½ x 8 ½ piece of Blue Bayou Card Stock, score at 4 ¼ and fold.

9. Cut a piece of 5 ½ x 2 piece of Confetti Card Stock.

10. Take the swirl stamp and stamp a background in Creamy Caramel, rotating the stamp as necessary.

11. Adhere ribbon to the middle of the stamped Confetti White Card Stock.

12. Adhere to the front of the card.

13. Punch out flower with 1 3/8 square punch and adhere as a diamond on the front of the card under the knot from the ribbon.

14. Stamp “Bonjour” in Blue Bayou on a Confetti White scrap.

15. Punch out with the small oval punch by placing the punch upside down so you can center the word.

16. Punch out a large oval from Creamy Caramel Card Stock and mount on the upper right side of the card, diagonal from the diamond.

Doulble Lines Doodle Faux Metal Card

Supplies
Double Lines Doodle Stamp Set
Basic Black Card Stock
Brushed Silver Card Stock
Whisper White Card Stock
Silver Encore Pad
Versamark Pad
Silver Emboss Powder
Scallop Circle Punch
Ticket Corner Punch
Pretty in Pink Taffeta Ribbon


Directions
1. Take a scrap of Whisper White Card Stock.

2. Ink large circle/heart stamp from Double Lines Doodle in Versamark ink and set aside.

3. Ink your card stock with the Versamark pad by pressing pad directly onto the card stock.

4. Sprinkle with silver embossing powder.

5. Heat with heat tool.

6. While it is still hot, sprinkle with embossing powder and heat again. Repeat three more times.

7. Stamp the embossed area with your stamp that you set aside.

8. Set aside to settle.

9. Cut a 5 ½ x 8 ½ piece of Basic Black Card Stock, score at 4 ¼ and fold.

10. Adhere a piece of ribbon to the front of the card with a knot just to the right of the center.

11. Cut a 2 ¼ x 2 ¼ piece of Basic Black Card Stock. Punch corners with the ticket corner punch.

12. Cut a 2 ½ x 2 ½ piece of brushed silver card stock and punch the corners with the ticket corner punch. Adhere to the back of the black piece.

13. Punch out circle/heart with the Scallop Circle punch and adhere to the black/silver squares with Dimmensionals.

14. Adhere just to the left of the bow.

15. Stamp the “I just love you” with the sliver encore pad to the lower right corner.


Tuesday, July 31, 2007

Punch A Bunch Promotion & Samples

August 1-31
Buy the Three for You Punch Box (#109227 $45.95) and receive exclusive Love Notes 30 3x3 Notecards with Ivory envelopes absolutely FREE -- a $12.95 value! You'll get 10 each of three colors: Purely Pommegranate, Wild Wasabi, So Saffron.

Following are some samples created with the punch box and/or Love Notes.


Saturday, July 28, 2007

Ahoy, Matey!

I've been dying to use this set. I think it's one of the cutest sets (of course, I have two little boys who love pirates)! I made this card tonight for a friends' son who is turning 3. We're all headed to his birthday party tomorrow, sure hope he (his parents) like it!

Supplies:


  • Ahoy, Matey

  • Matey's Map Jumbo Wheel

  • It's Your Birtday

  • Watercolor Wonder Crayons

  • Creamy Caramel CS

  • Naturals Ivory CS

  • Not Quite Navy CS

  • Ruby Red CS

  • Tearing Edge

Wednesday, July 25, 2007

In the Spotlight Hello


Here's a card I made for Bunco prizes...there were sets of 4 of these cards. I love the color combo and the simplicity of the card. I was able to make 10 in about an hour.
Supplies:
  • In the Spotlight Hostess Stamp Set
  • Wild Wasabi Card Stock
  • Rose Red Card Stock
  • Whisper White Card Stock
  • Wild Wasabi Classic Stamp Pad
  • Rose Red Classic Stamp Pad
  • Versamarker
  • Iridescent Ice Stampin' Emboss Powder
  • Silt Punch
  • 5 Petal Punch
  • Rich Regals Brads So Saffron
  • 3/16" Corner Rounder

Monday, July 23, 2007

New Invitations


This weekend, I had a cold, so I wasn't in the mood to stamp much, but I did finally get inspiration for these invitations to a party we're having in September. I used Chocolate Chip and Whisper White CS, Chocolate Chip CSP, Chocolate Taffeta Ribbon, Paisley BG, Trimtastic, and Hugs & Wishes Stamp Sets. It's a single panel card and they were fun to make. :)

Friday, July 20, 2007

Tried out the Year After Year Stamp Set

This morning I woke up early and couldn't sleep anymore, so I started stamping. I had wanted to make a small gift to take to some friends tomorrow when we go to dinner as told us we didn't need to bring anything, so I thought I'd make a set of cards! This was a fun set to make. There's two of each one: a baby card, a birthday card, a wedding card and a thank you card. I also made this cute little purse that I cased from . Antoinette Baumann Blake from a Hostess Gift Swap I hosted earlier in the year. For all the cards, I used the Stampin' Pastels with an Aqua Painter. I know this cute little card tote uses retired paper, but I just love it! Dimmensions for the tote are:

11x 9
Score at 4.5 & 6.5 on the 11" side
Score at 1.5 & 7.5 on te 9 " side
Then snip the area on th 2" bottom that is on the 1.5 outsides.
It'll make sense when you're looking at the grid.

Here are the cards that go inside:

This card uses the Print Background and the Chocolate Taffeta Ribbon. Colors are Chocolate Chip and Pretty in Pink.


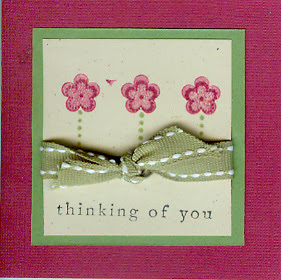
This card uses the blue gingham ribbon and the Aida Cloth Background stamp. I used Barely Banana, Bashful Blue and Ballet Blue for the greeting.


For this card, embossed the cake with Iridescent Ice and Embossed the greeting in Silver. I used the Elizabeth Fancy Fibers, and one of the rhinestone brads from the Pretties Kit. I used Basic Black and Brushed Silver papers.


This card uses the Certainly Celery Brads and the Itty Bitty Backgrounds. Colors are Almost Amethyst and Certainly Celery.

Wednesday, July 18, 2007

Snow Day Page--Masking Technique

Here's a page we created at a workshop late last fall. It was a lot of fun to make. You an also easily turn it into a 2-page spread as well.


Supplies
Snowflake Stampin’ Around Wheel
It’s Snow Time Stamp Set
Short Order Alphabet
Bashful Blue Card Stock 12 x 12
Whisper White 12 x 12 Card Stock
Mellow Moss 12 x 12 Card Stock
Bashful Blue Stampin’ Around Cartridge
Bashful Blue Classic Stampin’ Pad
Basic Black Classic Stampin’ Pad
Assortment of Stampin’ Write Markers
Stampin’ Pastels
Blender Pens
VersaMarker
Sponge Daubers
Stampin’ Dimensionals
SNAIL Adhesive
Anywhere Glue Stick
Tearing Edge
Moss Gingham Ribbon
1 3/8 inch circle punch
1 ¼ inch circle punch
¼ inch circle punch
Double Rectangle Punch
Stampin’ Around Wheel Guide
Mulberry Paper or used Dryer Sheets
Post-it notes


Directions
1. Using the Bashful Blue Stampin’ Around Cartridge, the Snowflake Wheel, and the Stampin’ Around Wheel Guide, stamp the snowflake background on the Bashful Blue 12 x 12 Card Stock.


2. Using the Tearing Edge, tear off one corner of the Whisper White Card 12 x 12 Card Stock.


3. Using the Basic Black Classic Stamp Pad and the snowmen from It’s Snow Time, stamp desired snowmen onto post it notes making sure to get at least part of the snowman on the sticky part. Cut out as close as possible. We will be using this when we stamp the trees on to mask the snowmen so the trees don’t stamp through the snowmen.


4. Using the Basic Black Classic Stamp Pad and the desired snowmen, stamp snowmen along the bottom of your white triangle as desired. Ensure that the corner is at the bottom right.


5. Place the cut out snowman post-it “masks” over the snowmen you stamped. Then, ink the tree stamp in Basic Black and stamp trees as desired.


6. Color and shade in as desired using Stampin’ Write Markers and/or Stampin’ Pastels with either blender pens or using the Versamarker and the daubers or Q-tips.


7. Using the ¼ inch circle punch, punch out the desired number of circles that will become snowballs. Color and shade as desired.


8. Glue them on to your scene as desired with Anywhere Glue or SNAIL Adhesive.


9. Using SNAIL Adhesive or Anywhere Glue, adhere your Stamped White Corner with your snowmen in to the lower right corner.


10. Cut a 5.5 x 7.5 piece and a 5.5 x 3 piece of Mellow Moss Card Stock.


11. Cut a 5.25 x 7.25 piece of Bashful Blue Card Stock. Distress and die edges if desired.


12. Cut a 5.25 x 2.75 piece of Whisper White Card Stock. Distress and Die Edges if desired.


13. With SNAIL Adhesive, adhere Mulberry Paper or used dryer sheet to the back of the Bashful Blue 5.25 x 7.25 then trim close to the paper, leave no more than ¼ inch. Using the double rectangle punch, punch holes in the top center.


14. Repeat with the 5.25 x 2.75 piece of Whisper White.


15. Line your Mulberry Paper backed piece of Bashful Blue Card Stock up with its Mellow Moss mat and punch holes in the same spot with the double rectangle punch. You may have to punch again just the mellow moss to get it to go through all the way.


16. Repeat with the Mulberry Paper backed Whisper White and its Mellow Moss mat.


17. Loop the Moss Grosgrain ribbon through the rectangles, one end in each whole through the front. Then cross and loop the ends back through their opposite holes.


18. Adhere your photo mat (blue) and your Journaling box (white) to the page side by side centered.


19. Using Bashful Blue Classic Stamp Pad and the Short Order Alphabet and spell out Snow Day. Be sure to leave enough room to punch out.


20. Punch out each letter with the 1 ¼ inch circle punch with the letters centered.


21. Using the 1 3/8 inch circle punch, punch out 7 Mellow Moss circles.


22. Using SNAIL or Anywhere Glue, Mat the letters with the moss circle.


23. Using Stampin’ Dimensionals, adhere matted letters to the page.


24. Crop and adhere desired photo to blue photo mat.


25. Write a brief description of the photo and or the day it was taken in the journaling mat.

Tuesday, July 17, 2007

Monkey Business Birthday Card


Here's a card we made at a Stamp-A-Stack

Supplies
Monkey Business Stamp Set
Eat Cake Stamp Set
Cool Caribbean Card Stock
Certainly Celery Card Stock
Whisper White Card Stock
Pumpkin Pie Classic Stampin’ Pad
Chocolate Chip Classic Stampin’ Pad
Cool Caribbean Classic Stampin’ Pad
Versamark pad
Silver Detail Stampin’ Emboss Powder
Tangerine Grosgrain Ribbon
SNAIL
Stampin’ Dimmensionals
Heat Tool
Paper Snips
Embossing Buddy
Stamp-a-ma-jig

Directions
· Cut a 5.5 x 8.5 piece of Cool Caribbean Card Stock. Score at 4.25 and fold.
· Cut a 3 x 3 piece of Whisper White Card Stock.
· Cut a 3 ¼ x 3 ¼ piece of Certainly Celery Card Stock.
· Cut a 5 ½ inch piece of Tangerine Grosgrain Ribbon.
· Using the Cool Caribbean Stamp pad and the twinkles stamp from Eat Cake, stamp a twinkle
background on the front of the card.
· Using the SNAIL, adhered the Tangerine Grosgrain Ribbon down the center of the front of the card.
· Using the standing monkey from Monkey Business and the Chocolate Chip Classic Stampin’ Pad, stamp the monkey in the lower right corner of the Whisper White Card Stock.
· Using the happy birthday stamp and the Cool Caribbean Classic Stampin’ Pad, stamp Happy Birthday in the lower left corner next to the monkey.
· Using the Pumpkin Pie Classic Stamp Pad and present stamp, stamp the present on a Whisper White Card Stock scrap.
· Once ink is dry, rub embossing buddy so excess powder won’t stick.
· Using the ribbon stamp and the Versamark Pad, and stamp-a-ma-jig if desired for positioning, stamp the ribbon over the package.
· Sprinkle some silver detail stampin’ emboss powder over it and tap off excess. Set with heat too.
· Cut the present out and adhere to the Whisper White card stock with a dimensional so it looks like the Monkey is holding it.
· Adhere the Whisper White Card Stock to the Certainly Celery Card Stock.
· Adhere the whole things to the front of the card at an angle.

Monday, July 16, 2007

Retired SU! Stamps for Sale

I'm a Stampin' Up! Demonstrator and I have a bunch of sets that retired I need to sell to make room for all the great new sets that ae now avilable. Please e-mail me if you have questions. Most are used and some have staining on the rubber or wood blocks. Most aren't more than a year old, but a few are older. ALL are still in VERY USABLE condition...no cracking, etc...Prices are minimum 25% off their list price UNLESS they are new and unmounted. Here's a list of what I have to offer:

SHIPPING IS $4.60 FOR ONE SET/$8.95 FOR UPTO 5 SETS. (PRIORITY FLAT RATE)

*If you buy all 3, I whimsical alphabets, I’ll take $5 more off the price.
*Whimsical Alphabet Lower$20 --PENDING
*Whimsical Alphabet Upper$20
*Whimsical numbers$12
A is for Adorable (Level 2 Hostess Set) $15
A New Little Someone $15
All Year Cheer II $22 --SOLD
All Year Cheer III $22
Basket Full of Fun (Level 3 Hostess Set) $20---SOLD
Blooming with Happiness (Level 1 Hostess Set) $10
Both Way Blossoms (Level 2 Hostess Set) $15 --SOLD
Build a Blossom $10
Burst into Bloom $8—SOLD
First in Fashion $10
Fresh Fillers $8--SOLD
Good Times, Retired 2006 $22
Halloween Backgrounds$8 --SOLD
Handmade with Love II $7
Itty Bitty Borders $9
Ladybuds $10--SOLD
Little Layers plus $7.50
Little Somethings $12
Love It (Level 2 hostess Set) $15
Made From Scratch (Level 1 Hostess set 2005-2006)$10
Merry (New Unmounted) $22
Mini Mates (New unmounted) $29
Mini Medley (Retired 2006) $12
Mon Ami $11--SOLD
Noteworthy $7
Peace and Love $18 --SOLD
Petite Patterns $8 --SOLD
Reason to Smile (Level 1 Hostess Set) $10--SOLD
Riveting (level 1 Hostess Set) $10 -- SOLD
Sketch It (only 4 of 12 mounted) $27--SOLD
Snowflakes $16
Springtime Stems (Level 1 Hostess Set) $10 –SOLD
Stars and Swirls $8
Stipple Plaid Background $5
Sweet Talk $5--Sold
Tags So Much (Level 1 Hostess Set) $10 –SOLD
The World Over (Level 1 Hostess Set) $10
Trick or Treat $8
Trim the Tree $10
Warmest Regards (Level 1 Hostess Set) $10—SOLD
What's For Dinner $15--SOLD
Wheel, Leaf Prints $3 --SOLD
Wheel, Love Swirls $3 --SOLD
Wheel, Party $3
Wheel, Polka Dot Blocks $3 (GOES GREAT with mini mates!)
Wheel, Size it Up $3
Wheel, Sweet Feet (Q=2) $3 each--SOLD 1--1 LEFT
Wheel, Whirly Twirly $3 --SOLD

Finally figured out the photo thing!


Photos are elemetal to a Stampin' blog and I could't figure out bow to add them! I'm pretty computer savvy, but it took me a while...probably because my boys were asking for stuff. :)
This is a 12x12 page I created for the Stampin' Up! Friends Online Unconvention last week. I taught a class focusing on creating pages with stamps and papers (OK, I added a ribbon). But I wanted to showcase how easy scrapbooking can be with stamps becuase they're so versatile. If you wat to recreate the page, here are the supplies and directions. Enjoy

Supplies
· 1 -12x12 Certainly Celery Card Stock
· 1-12x12 Barley Banana CS
· 1 -12x12 Brocade Blue CS
· Whisper White CS
· So Saffron Classic Stamp Pad
· Certainly Celery CSP
· Brocade Blue CSP
· Slit Punch
· 1 1/4 Circle Punch
· 1 3/8 Circle Punch
· 1 1/4 Square Punch
· 1 3/8 Square Punch;
· Horizontal Slot Punch
· Corner Rounder Punch
· Celery Grosgrain Ribbon
· SNAIL
· Anywhere Glue
· Dimmensionals
· Be Happy Stamp Set
· Itty Bitty Backgrounds
· Short Order Alphabet

Directions
· Using the Certainly Celery CSP and the stamp with polkadots and open circles on it from Itty Bitty Backgrounds, stamp a background all over the 12x12 Certainly Celery CS.

· Cut two 1x12-inch strips of Barely Banana CS.

· Using the So Saffron CSP and the polkadots from Itty Bitty Backgrounds, stamp backgrounds on the strips.

· Cut two 1.5x12-inch strips of Brocade Blue CS.

· Place one Brocade Blue Card Stock strip all the way in the slit punch at the corner of the strip and punch. Repeat for the entire length of the strip being very careful to line the side up with the edge of the previous slit. This will make a scalloped border. Repeat with the second strip. Remove the top layer of paper that punches off.

· Adhere to the back of the Barely Banana Strips, but DON’T glue down about two inches from the end of each strip so you can hide the blue in the back and get a nice corner.

· Adhere one strip to the left side of the page and one to the top of the page making sure to tuck the blues in behind the yellow so you get a yellow corner and then a blue corner. Glue down.

· Cut two 4.25 x 6.25 pieces of Barely Banana Card Stock. Round the corners if desired.

· Stamp the same polkadot background on the pieces as you did the strips in So Saffron.

· Select your photos, 4x6 size, and round the corners if you rounded the corners on the mats.

· Mat the photos with the stamped 4.25x6.25 pieces of Barely Banana. Adhere to the pages about 1 inch from the left border and one inch from the top border and about 1 inch in between, as shown.

· Cut a 3.5 x 2.5 piece of Brocade Blue Card Stock and round corners if desired.

· Cut a 3.25x2.25 piece of Whisper White Card Stock. Round corners if desired. This area becomes your area to journal or document the events you are scrapping about.

· If desired, use the horizontal slot punch to create a hole and loop a 3-inch piece of celery grosgrain ribbon trough the slot to make it look like a tag.

· Make sure to write your journaling before you glue to the page so you can redo if necessary.
· Mount to the bottom right of the page, centered next to the bottom picture.
· Using the Be Happy Stamp Set, stamp one Certainly Celery Flower on Whisper White CS. Cut it out, mat with a scrap of Brocade Blue CS and cut out again leaving a border.

· Using a Dimmensional or Glue Dot, adhere to the corner of the page covering the seam from the Barely Banana Cardstock corner.

· Stamp the Smile stamp in So Saffron on Whisper White two times. Punch out using the 1 ¼ circle punch.

· Punch out to Brocade Blue 1 3/8 circles and mat your smiles with them.
· Stamp the Enjoy stamp in Brocade Blue on Whisper White two times. Punch out with the 1 ¼ square punch.

· Punch out 2 So Saffron 1 3/8 squares and use them to mat the Enjoy Squares.

· Alternate the Smiles and Enjoys down the left side of the page, adhering with Dimmensionals.

· Stamp the Laugh, play and share stamp in Brocade Blue on Whisper White and cute out. Mat with Barely Banana. Adhere to the page with 2 Dimmensionals, one on each of two alternating corners, linking the two photos together.

· Lastly, you need to title your page. I Chose to use the Short order Alphabet, punch out the letters with my 1 ¼ circle punch and mat with 1 3/8 brocade blue circles. You can also simply handwrite your title, use a different Alphabet, etc…

Sunday, July 15, 2007

Joining the Blogging World--Finally!

I've seen so many wonderful blogs out there from so many talented Stampin' Up! Demonstrators, that I thought I'd give it a whirl. Stay tuned for projects, tutorials and specials!